The Oculus Quest 2 has revolutionized the world of virtual reality, offering an immersive and versatile experience. However, just like any other electronic device, there may be times when you need to perform a factory reset. Whether you’re troubleshooting issues, preparing the device for a new owner, or simply want to start over, factory resetting your Oculus Quest 2 is a straightforward process.
In this guide, we will walk you through the exact steps you need to follow to How To Factory Reset Oculus Quest 2, ensuring that you can get back to enjoying your VR experience with ease.
Read Also: Complete Meta Quest 3 VR Headset Review
Article Outline
- 0.1 Why Should You Factory Reset Your Oculus Quest 2?
- 0.2 How To Factory Reset Oculus Quest 2: Step-by-Step
- 0.2.1 Method 1: Factory Reset via the Settings Menu
- 0.2.2 Power On Your Oculus Quest 2
- 0.2.3 Access the Main Menu
- 0.2.4 Navigate to Settings
- 0.2.5 Go to ‘Device’ Settings
- 0.2.6 Access ‘Advanced Settings’
- 0.2.7 Select ‘Factory Reset’
- 0.2.8 Confirm the Reset
- 0.2.9 Wait for the Reset to Complete
- 0.2.10 Method 2: Factory Reset Using the Oculus Quest 2’s Physical Buttons (If the Device is Unresponsive)
- 0.2.11 Power Off Your Oculus Quest 2
- 0.2.12 Press and Hold the Volume Down and Power Buttons
- 0.2.13 Wait for the Boot Menu to Appear
- 0.2.14 Navigate to ‘Factory Reset’
- 0.2.15 Confirm the Reset
- 0.2.16 Wait for the Reset Process to Complete
- 0.3 Important Considerations Before Factory Resetting Your Oculus Quest 2
- 1 Concluding Remarks
- 2 Summary
Why Should You Factory Reset Your Oculus Quest 2?
Factory resetting your Oculus Quest 2 can be a necessary step under various circumstances. Whether you’re facing persistent technical issues, preparing the device for resale, or simply want a fresh start, a factory reset can be an effective solution. In this section, we’ll explore in detail why and when you should consider performing a factory reset on your Oculus Quest 2.
1. Troubleshooting Persistent Problems
As with any electronic device, there may come a time when your Oculus Quest 2 experiences problems that can’t be solved with simple troubleshooting methods. Issues like frequent crashes, system lag, or unexpected freezes can severely impact your experience, especially during gameplay. While updates are regularly rolled out to fix known bugs, software issues can sometimes persist, even after you’ve applied the latest patches.
In these cases, a factory reset can be the most effective way to resolve these problems. When you perform a factory reset, the Oculus Quest 2 returns to its original, out-of-the-box settings. This removes all accumulated software glitches, corrupt files, and conflicting system settings that may be causing instability. If you’ve tried restarting the device, reinstalling apps, or updating the system without success, a factory reset can provide a clean slate and often resolve the underlying issues causing the device to malfunction.
2. Selling or Giving Away the Device
Another significant reason to factory reset your Oculus Quest 2 is when you plan to sell or give the device to someone else. The Oculus Quest 2 stores a considerable amount of personal data, including your Oculus account information, game progress, apps, and even payment details. If you’re giving away or selling the device, it’s essential to wipe all of this information to protect your privacy and ensure the new owner can set up the device as if it were brand new.
A factory reset guarantees that all personal data, including your login credentials and saved preferences, are completely erased. This means that the new owner will not have access to any of your content, including your app purchases, game data, or private information. If you don’t perform a reset before transferring the device, you risk leaving behind traces of your personal account, which could lead to security concerns. A reset ensures that the new owner can use the device without encountering any remnants of your account or apps, providing them with a smooth setup experience.
Moreover, performing a factory reset is a recommended practice by Oculus before reselling or gifting your Quest 2. It’s not just about protecting your personal information; it’s about making sure the device is in its best possible state for the new owner. After a reset, the device will be free of any apps or settings that could interfere with their own experience, ensuring they can begin their journey with the Oculus Quest 2 without issues.
3. Starting Fresh with a Clean Slate
Sometimes, you might simply want to start fresh with your Oculus Quest 2. Over time, as you install and uninstall apps, change settings, and accumulate various VR experiences, your device can become cluttered. Your storage may get filled up, and settings may become cumbersome or inefficient. If you find that your Oculus Quest 2 isn’t performing as well as it used to, or if the device feels bloated with too many apps and settings, performing a factory reset can be an excellent way to regain that “new device” feel.
A factory reset will delete all apps, games, and user data, effectively cleaning the device of anything that may have accumulated during your time with it. This provides a fresh start, allowing you to reorganize your VR experience, reinstall only the apps you use, and configure the settings to suit your current needs. If you’ve been experiencing performance issues due to a high volume of stored data or have grown frustrated with the device’s current state, resetting it can help restore a smooth and optimal user experience.
4. Privacy and Security Reasons
Factory resetting your Oculus Quest 2 can also be an essential step for protecting your privacy and security, especially if you’re concerned about leaving behind sensitive information. Even though Oculus accounts are designed to be secure, the device still stores your personal data, including login credentials, payment information, and any apps you’ve purchased or downloaded. If you’re planning to give the device to someone else or even just want to be sure that no one else can access your data, a factory reset ensures that everything is wiped clean.
A factory reset deletes all user data from the device, making it virtually impossible for anyone else to access your personal accounts or information without your permission. This is especially important if you’ve linked your Oculus Quest 2 to social media accounts, shared payment details for in-app purchases, or stored any sensitive data. With a reset, all of these details are erased, preventing unauthorized access. This is particularly important if you’re concerned about security risks or simply want to ensure that your data doesn’t linger on the device after you’re done using it.
How To Factory Reset Oculus Quest 2: Step-by-Step
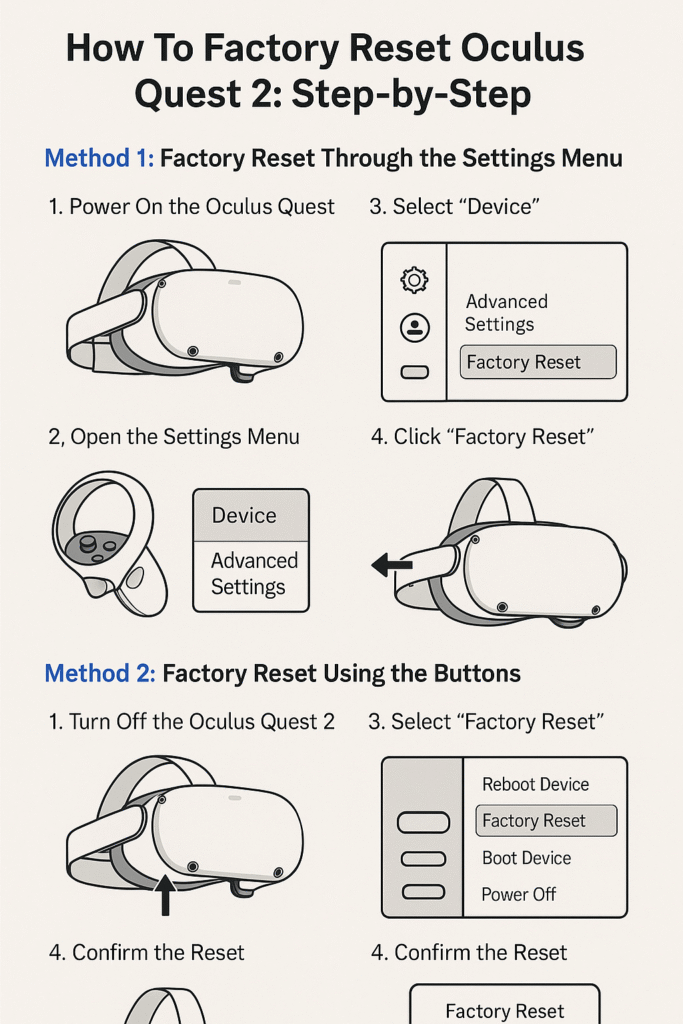
There are two main ways to factory reset the Oculus Quest 2: through the device’s settings menu or by using the physical buttons on the headset itself. Here’s how to perform a reset through both methods:
Method 1: Factory Reset via the Settings Menu
If your Oculus Quest 2 is responsive and you can access the settings menu, this method is the easiest and most straightforward way to perform a factory reset. Follow these steps carefully:
Power On Your Oculus Quest 2
First, ensure that your Oculus Quest 2 is powered on. Press and hold the power button on the right side of the headset for a few seconds until the device turns on. You’ll see the Oculus logo, indicating the device is ready for use.
Access the Main Menu
After your Oculus Quest 2 powers up, press the Oculus button (located on your right-hand controller) to bring up the universal menu. This is the main menu that appears while wearing the headset.
In the main menu, look for the gear icon labeled Settings at the bottom left of the screen. Use your controllers to hover over the icon and click to open the Settings menu.
Go to ‘Device’ Settings
Once you’re inside the Settings menu, scroll down and look for the Device section. This is where you’ll manage settings specific to your Oculus hardware.
Access ‘Advanced Settings’
Within the Device settings, scroll down further to find an option called Advanced Settings. Click on it to reveal additional options.
Select ‘Factory Reset’
In the Advanced Settings menu, you will see the option labeled Factory Reset. Select this option to proceed with the reset.
Confirm the Reset
A confirmation prompt will appear, asking you if you’re sure you want to proceed with the factory reset. This will wipe all personal data, settings, and apps from your Oculus Quest 2. You’ll be required to select Reset to confirm the action.
Wait for the Reset to Complete
The Oculus Quest 2 will now begin the reset process. This might take a few minutes. During this time, your headset may restart, and all personal data will be erased. Once the reset is complete, your device will automatically reboot and present the initial setup screen, as it was when you first bought it.
Method 2: Factory Reset Using the Oculus Quest 2’s Physical Buttons (If the Device is Unresponsive)
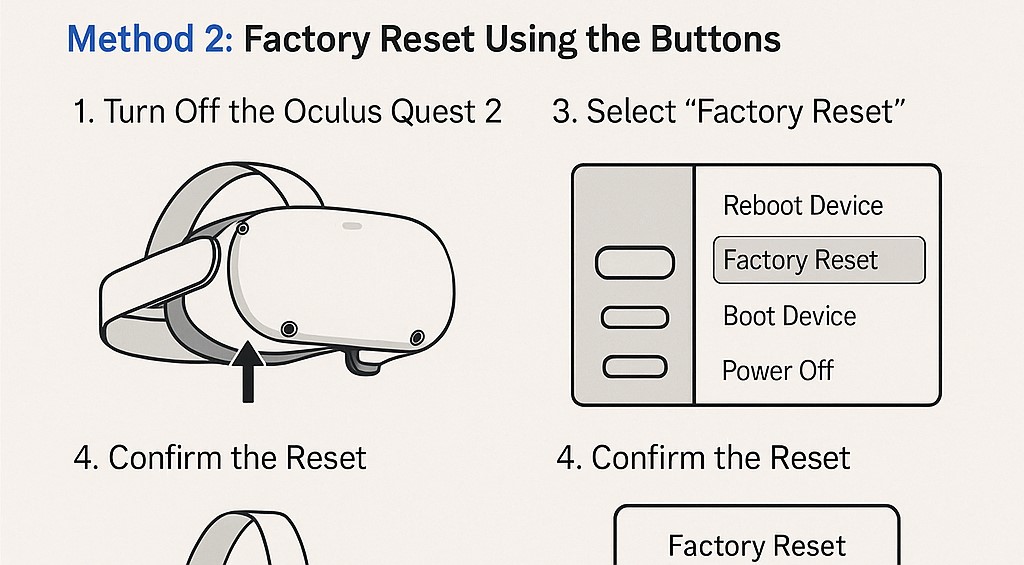
In some cases, your Oculus Quest 2 might become unresponsive, and you won’t be able to access the settings menu. In this situation, you can use the physical buttons on the headset itself to initiate a factory reset. Here’s how to do it:
Power Off Your Oculus Quest 2
Start by turning off your Oculus Quest 2. Hold down the power button (located on the right side of the headset) for about 5 seconds, then select Power Off when the option appears on screen. Make sure the headset is completely off before continuing.
Press and Hold the Volume Down and Power Buttons
With the headset turned off, press and hold both the Volume Down button (on the left side of the headset) and the Power button simultaneously. You will need to press both buttons at the same time and hold them for about 10 to 15 seconds.
Wait for the Boot Menu to Appear
After holding the buttons, you’ll see the Oculus logo appear on the screen, followed by the boot menu. This is a special recovery menu that allows you to access various reset options. Once the logo appears, release both the Volume Down and Power buttons.
Use the Volume buttons to navigate through the boot menu. Scroll down to the option that says Factory Reset. Highlight it, and then press the Power button to select it.
Confirm the Reset
A confirmation screen will appear asking if you’re sure you want to erase all data and reset the device. To confirm, use the Volume buttons to select Yes, and then press the Power button to confirm your choice.
Wait for the Reset Process to Complete
The Oculus Quest 2 will now begin the factory reset process. This process may take a few minutes, during which your device will wipe all data and return to its factory state. Once the process is complete, your headset will reboot, and the device will be in its original setup mode, just as it was when you first purchased it.
Important Considerations Before Factory Resetting Your Oculus Quest 2
Before performing a factory reset, there are a few key things to keep in mind:
- Backup Your Data: A factory reset will erase all apps, games, and personal data, including any progress in VR apps or games. Make sure to back up any important data, such as saved game progress, if possible, using the Oculus app on your smartphone or by saving data to cloud storage.
- Login Credentials: You will need to log back into your Oculus account after the reset. Make sure you have your account information handy so you can restore your content.
- Cannot Undo the Reset: You cannot undone factory reset. All data will be permanently erased from the headset. Only proceed with a reset if you’re sure you want to remove all data and settings.
- Factory Reset Cannot Fix Hardware Issues: If your Oculus Quest 2 is experiencing hardware failures, such as screen damage, controller malfunctions, or other physical problems, a factory reset will not resolve these issues. In such cases, you should reach out to Oculus support for assistance.
Read Also: Top 10 Meta Quest 3 Games You Need to Play in 2025